Introduction
Maintaining optimal soil moisture is crucial for the health and growth of plants. Traditional watering methods can be time-consuming and inconsistent, leading to overwatering or underwatering. This project leverages the capabilities of the Arduino R4, along with a capacitive soil moisture sensor v2, RGB LED, and a relay-controlled water pump, to create a smart plant watering automation system. This system ensures your plants receive the right amount of water at the right time, enhancing plant growth and conserving water resources.
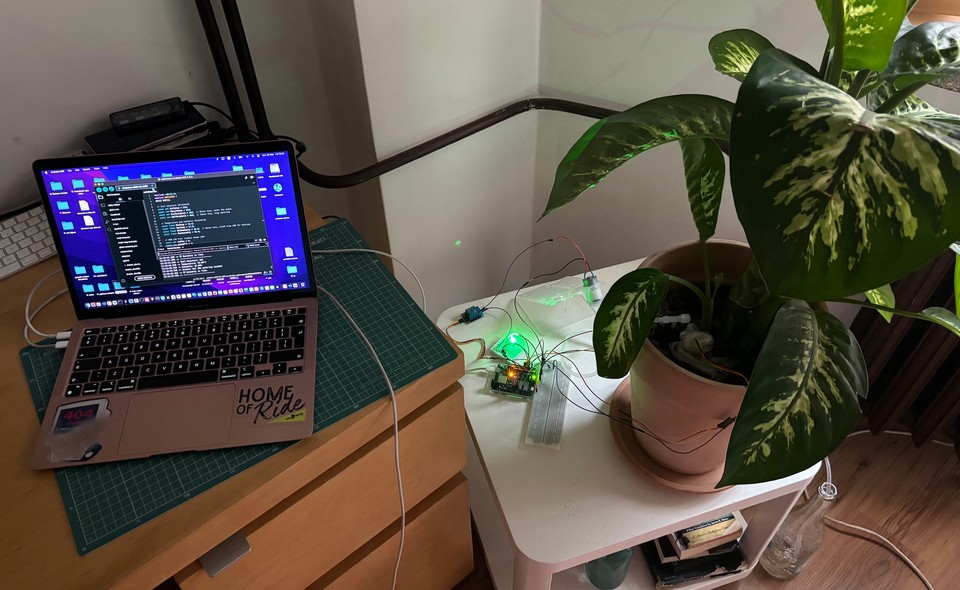
 Figure 1: The complete setup of the Arduino-based smart watering system, showcasing the Arduino R4, capacitive soil moisture sensor, relay module, water pump, and RGB LED.
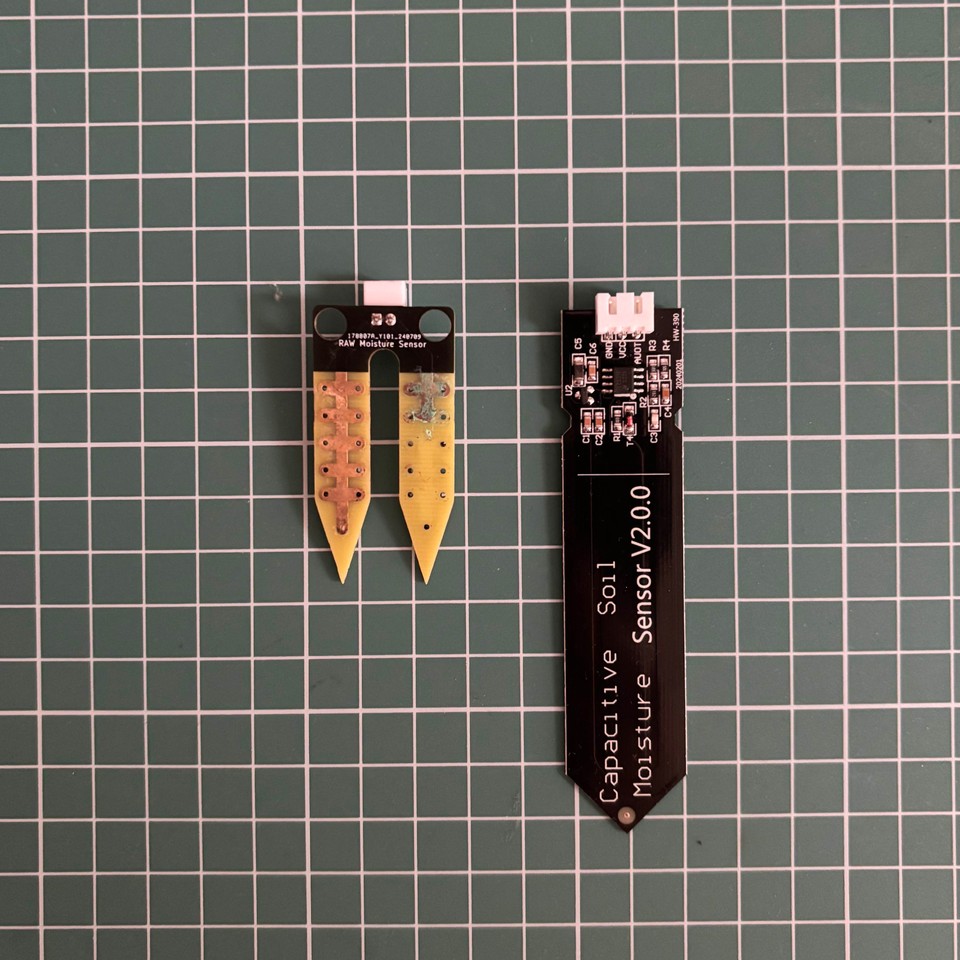
 Figure 2: Comparison between the raw (V1) and capacitive (V2) soil moisture sensors. The capacitive sensor offers improved accuracy and durability.
 Figure 3: Real-time data visualization from the sensors, displaying soil moisture levels, temperature, and humidity.
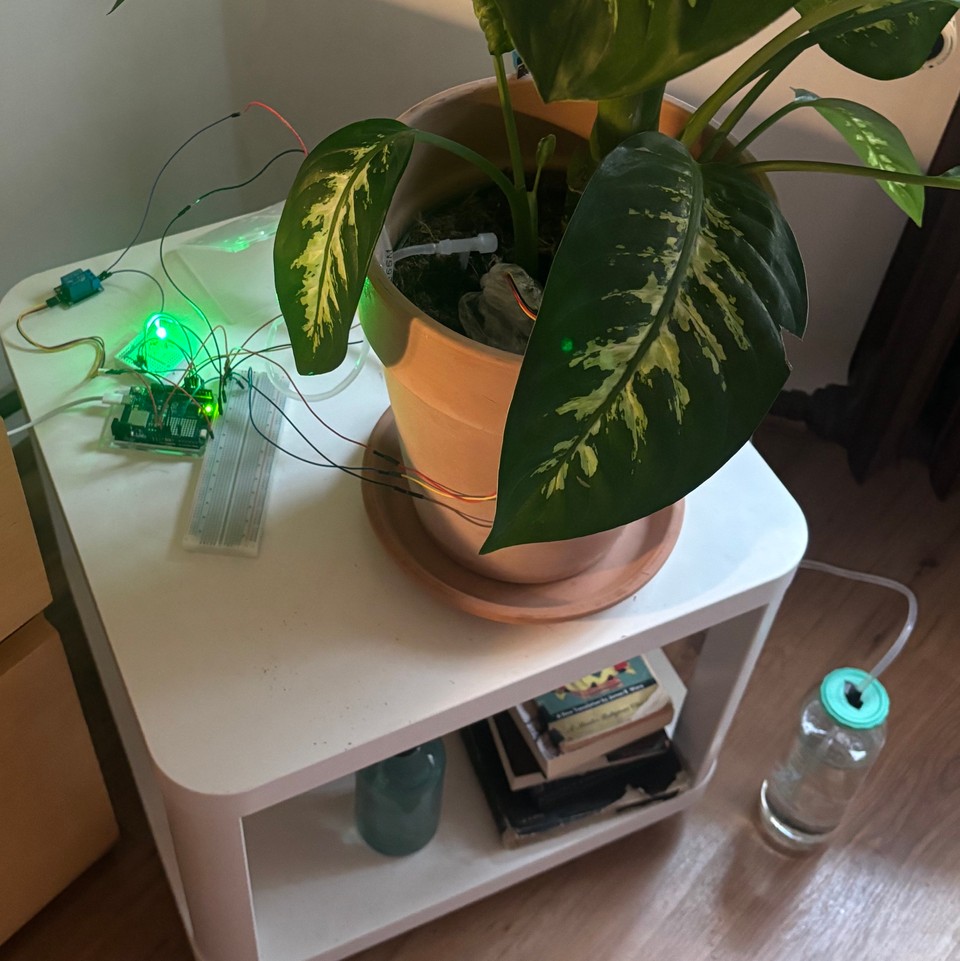
 Figure 4: A close-up view of the smart watering system installed in a plant pot, demonstrating the integration of all components.
Components Overview
DHT11 Temperature and Humidity Sensor
The DHT11 sensor measures the ambient temperature and humidity levels. Accurate readings of these parameters help in determining the optimal watering schedule, ensuring that plants are neither overwatered nor exposed to unfavorable environmental conditions.
Capacitive Soil Moisture Sensor v2
Unlike raw moisture sensors, the capacitive version provides more accurate and reliable soil moisture readings. It measures the volumetric water content by detecting changes in capacitance, which are less prone to corrosion and degradation over time compared to resistive sensors.
Relay Module
The relay acts as a switch that controls the power supply to the water pump. It allows the low-power Arduino to control the higher-power pump safely, enabling automated watering based on sensor inputs.
Water Pump
The water pump is responsible for delivering water to the plants when the soil moisture levels drop below the set threshold. It ensures consistent and timely watering, which is essential for plant health.
RGB LED
The RGB LED provides visual feedback on the system's status. Different colors indicate various states such as active watering, optimal moisture levels, or alerts for low humidity, enhancing user interaction and system monitoring.
Difference Between Raw and Capacitive Soil Moisture Sensors
Soil moisture sensors are essential for monitoring the water content in the soil, but not all sensors perform equally. Here's how raw (resistive) sensors compare to capacitive soil moisture sensors v2:
- Accuracy: Capacitive sensors provide more precise measurements of soil moisture levels by detecting changes in capacitance, whereas raw sensors measure electrical resistance, which can be less accurate.
- Durability: Capacitive sensors are less prone to corrosion since they do not require direct contact between electrodes and soil, unlike raw sensors that can degrade over time.
- Maintenance: Capacitive sensors require less maintenance due to their corrosion-resistant properties, ensuring longer service life and reliable performance.
- Environmental Impact: Capacitive sensors are better suited for long-term soil monitoring in various environmental conditions, making them ideal for smart watering systems.
Source Code for Arduino UNO R4
1#include <dht11.h>2#define DHT11PIN 73dht11 DHT11;4
5// Soil moisture thresholds6const int AirValue = 520;7const int WaterValue = 260;8const int DryThreshold = 350; // Below this, water the plant9const int WetThreshold = 400; // Above this, stop watering10
11// Temperature and humidity thresholds12const float MinTemp = 18.0;13const float MaxTemp = 27.0;14const float MinHumidity = 40.0; // Below this, blink blue LED for misting15const float MaxHumidity = 80.0;16
17// RGB LED Pins (Common Anode LED)18const int redPin = 6;19const int greenPin = 5;20const int bluePin = 4;21
22// Relay pin for water pump23const int relayPin = 2;24
25// Safety mechanism26unsigned long relayStartTime = 0;27const unsigned long maxWateringTime = 5000; // 5 seconds max watering28
29void setup() {30 Serial.begin(9600);31
32 pinMode(redPin, OUTPUT);33 pinMode(greenPin, OUTPUT);34 pinMode(bluePin, OUTPUT);35 pinMode(relayPin, OUTPUT);36
37 digitalWrite(relayPin, LOW); // Ensure pump is off initially38}39
40void loop() {41 int soilMoistureValue = analogRead(A0);42 int chk = DHT11.read(DHT11PIN);43 float temperature = (float)DHT11.temperature;44 float humidity = (float)DHT11.humidity;45
46 // Log sensor readings47 Serial.println("===== Sensor Readings =====");48 Serial.print("Soil Moisture: ");49 Serial.println(soilMoistureValue);50 Serial.print("Temperature: ");51 Serial.print(temperature);52 Serial.println("°C");53 Serial.print("Humidity: ");54 Serial.print(humidity);55 Serial.println("%");56
57 // **Check soil moisture and control pump**58 if (soilMoistureValue > DryThreshold) {59 Serial.println("Status: Dry - Watering...");60 setLED(0, 255, 255); // Red61 digitalWrite(relayPin, HIGH); // Pump ON62 relayStartTime = millis(); // Record start time63 }64 else if (soilMoistureValue <= WetThreshold) {65 Serial.println("Status: Wet (No watering needed)");66 setLED(255, 0, 255); // Green for good moisture67 digitalWrite(relayPin, LOW);68 }69 else {70 Serial.println("Status: Moderately Moist");71 setLED(255, 255, 0); // Yellow72 digitalWrite(relayPin, LOW);73 }74
75 // **Check if the pump has been running too long**76 if (digitalRead(relayPin) == HIGH && millis() - relayStartTime > maxWateringTime) {77 Serial.println("⚠️ Safety Warning: Max watering time reached! Stopping pump.");78 digitalWrite(relayPin, LOW); // Force turn off pump79 }80
81 // **Check humidity and blink blue LED if too low**82 if (humidity < MinHumidity) {83 Serial.println("⚠️ Humidity too low! Blinking blue LED for misting reminder.");84 blinkBlueLED();85 }86 else {87 Serial.println("✅ Humidity is fine.");88 }89
90 Serial.println("-------------------------");91 delay(2000); // Short delay to prevent excessive processing92}93
94// **Function to set RGB LED color**95void setLED(int red, int green, int blue) {96 analogWrite(redPin, red);97 analogWrite(greenPin, green);98 analogWrite(bluePin, blue);99}100
101// **Function to blink blue LED for misting reminder**102void blinkBlueLED() {103 for (int i = 0; i < 3; i++) { // Blink 3 times104 setLED(255, 255, 0); // Yellow (default state)105 delay(500);106 setLED(255, 255, 255); // White (off)107 delay(500);108 }109}Project Workflow
Setting up the smart plant watering automation involves several key steps:
- Component Assembly: Connect the capacitive soil moisture sensor to the Arduino R4's analog input pin. Integrate the DHT11 sensor for temperature and humidity measurements. Connect the relay module to control the water pump and wire the RGB LED for status indicators.
- Programming the Arduino: Upload the provided source code to the Arduino R4. The code reads data from the sensors, evaluates soil moisture levels, and controls the relay based on predefined thresholds.
- Configuring Thresholds: Adjust the
DryThresholdandWetThresholdvalues in the code to match the specific needs of your plants. These thresholds determine when the system activates the water pump. - Testing the System: Once assembled and programmed, test the system by simulating different soil moisture conditions. Observe the RGB LED indicators and ensure the water pump activates appropriately.
- Deployment: Install the system in your plant setup. Monitor its performance and make any necessary adjustments to optimize watering schedules and sensor accuracy.
Video Example
The accompanying video demonstrates the functionality of the DIY smart watering system. You'll observe the system in action as it monitors soil moisture levels and automatically activates the water pump when needed. The video highlights the seamless integration of the Arduino R4 with the capacitive soil moisture sensor, relay module, and RGB LED, showcasing real-time responses to changing soil conditions. Additionally, it provides insights into the setup process and practical applications of the system in everyday plant care.
Strong Points and Benefits
- Automated Efficiency: Eliminates the need for manual watering, ensuring plants receive consistent moisture levels.
- Resource Conservation: Optimizes water usage, reducing waste and promoting sustainable gardening practices.
- Enhanced Plant Health: Maintains optimal soil conditions, preventing common issues related to overwatering or underwatering.
- Scalability: Easily expandable to accommodate multiple plants or larger gardening setups.
- User-Friendly Indicators: RGB LED provides clear visual cues about the system's status, making monitoring straightforward.
- Cost-Effective Solution: Utilizes affordable components to create a reliable and effective watering system without significant investment.
Comments
You must be logged in to comment.
Loading comments...